Thank you to those who commented yesterday. I realize I wasn't really clear in how I finished off the border on this thing, so I'm going to try and attempt a better explanation. If you have no interest, feel free to skip the rest of this post!
Knit on border:
Instead of binding off at the end of the project, cut your yarns and choose the one you wish to make the border with. Using a DPN of the same size as your project needle, cast on 5 sts.
Row 1: With a 2nd DPN, knit 4 sts. Slip the last st as if to knit. Slip the first stitch on your bind-off row, also as if to knit. Knit these 2 sts thru-back-loop.
Row 2: (Can be done using project needle): Turn, knit 5.
Although the picture is actually from the other side of the blanket (where I cut off the border and picked up live stitches again), this is what it will look like after a few rows: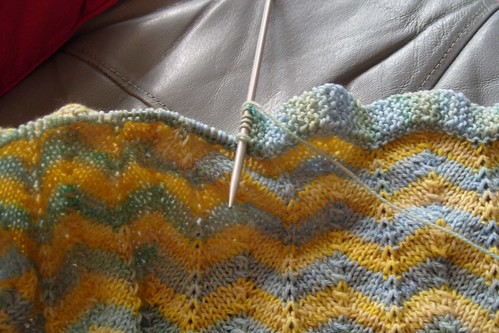
Repeat these two rows until there are no live stitches left on the project needle.
Turn corner: Work short rows (Knit 4, w&t, knit to end, knit 3, w&t, knit to end, k2 w&t, knit to end, k1 w&t, knit to end). Then repeat short rows in reverse (knit 2 w&t, etc until you have knit 4 and w&t'd the last stitch).
Now you will work the border along the side. I slipped the first and last stitch on every WS row when working the body of the blanket, so I had a nice space to pick up all the way along.
RS rows: knit 4, sl1-kwise, pick up one stitch, psso
WS rows: k5
Once you have picked up all the stitches along one side, you'll turn a corner again and do the same along the bottom. Or, if you're really smart and thinking ahead, perhaps you'll have cast-on in such a way that you'll have live stitches that you can put back on the needle. Or, if you have no fore-thought, like me, you'll cut off the border that you dislike, pick up the live stitches again and hope for the best from there!
Once you've completed all four edges, you'll be back to where you ended the body of your blanket and cast-on for the border. My suggestion: Turn another corner, then turn the whole blanket over. Pick up stitches in the cast-on edge of the border (5 total) and work a 3 needle bind-off to connect them together. Unless you're absolutely staring at it, I don't think you can tell the difference between that and the other corners at all: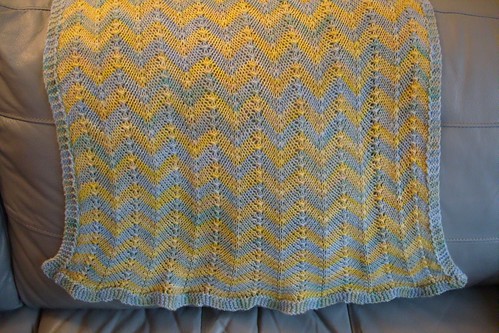
can you tell which corner has the cast-on edge?
It still furls out a bit on the corners, but that's a function of the pattern and unless I wanted to be super-agressive in my blocking, I don't think it can much be helped. I still think it's much better than the original border I knit.
Please note: none of this is new or made-up by me. I read about knitting the edge on in EZ's Knitter's Almanac and the corners and side borders are adapted from the 10 stitch blanket. Credit where credit is due! I'm not sure if or where I might have seen the corner turn to 3 needle bind off before, but I am sure I cannot be the first.

Monday, January 14, 2013
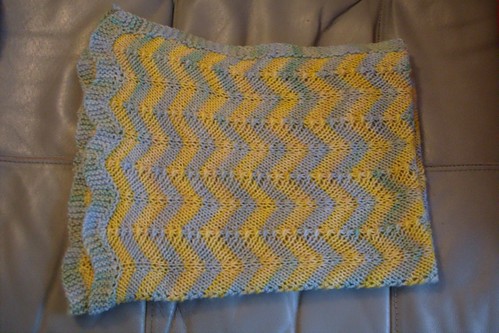
blocked, waiting for baby
Subscribe to:
Post Comments (Atom)
2 comments:
That is lovely! What a lucky baby to be wrapped in something so delicious looking. I thought you had picked up the stitches in the middle in order to cut your work!
It's really beautiful, i love the colours you chose. The border turned out so well
Post a Comment